Retaining Wall Cap Installation Guide: Step-by-Step Tips
Retaining walls are a key feature in landscaping, providing both functional and aesthetic value to your outdoor spaces. They help hold back soil, prevent erosion, and create level areas on sloped properties. To complete and enhance the appearance and durability of a retaining wall, a retaining wall cap is essential. Installing a cap properly not only boosts the wall’s visual appeal but also protects the structure from weather and wear.
In this comprehensive guide, we will walk you through the step-by-step process of installing a retaining wall cap, offering expert tips and covering everything from preparation to finishing touches. Whether you’re a DIY enthusiast or a professional, this guide will ensure that you get the job done right.
What Is a Retaining Wall Cap and Why Is It Important?
A retaining wall cap is the top layer of a retaining wall, typically made from stone, concrete, or other durable materials. It serves both practical and aesthetic purposes. The cap provides a smooth, finished edge, protecting the wall from water infiltration, which can weaken the structure over time. It also adds a decorative element to the wall, enhancing its overall look.
Installing a cap correctly ensures that your wall will stand strong for years to come. Without it, the exposed wall could suffer from erosion, weather damage, and movement due to freeze-thaw cycles, leading to costly repairs or premature failure. The cap also makes the top of the wall safer and more comfortable if you plan to use it as a seat or for decoration.
Tools and Materials You’ll Need for Retaining Wall Cap Installation
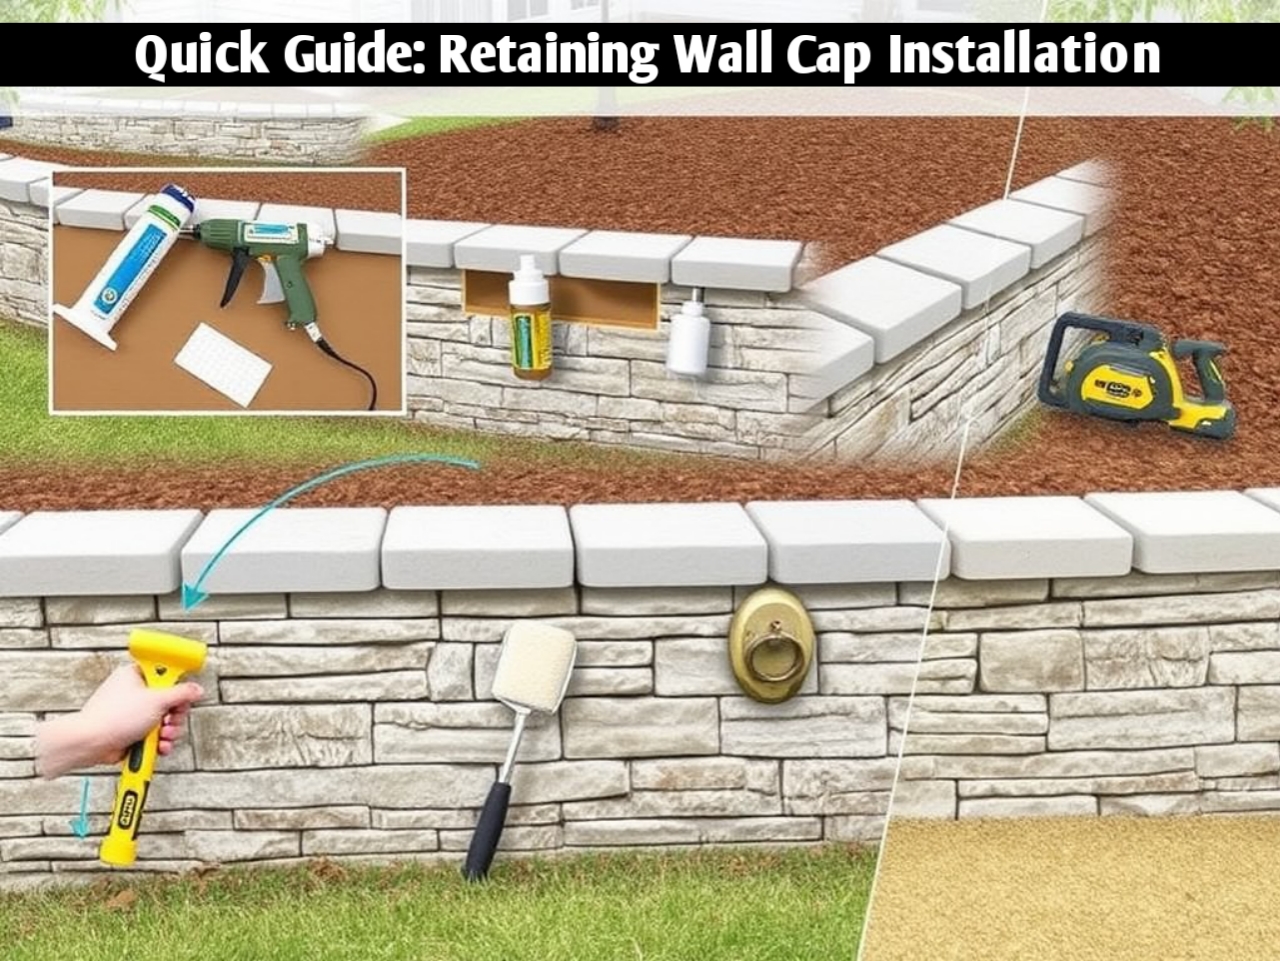
Before starting your installation project, it’s essential to gather all the necessary tools and materials. Being well-prepared will make the process smoother and more efficient. Here’s a list of common tools and materials required for installing a retaining wall cap:
Tools:
- Tape measure
- Level
- Hammer and chisel (for cutting caps)
- Rubber mallet
- Circular saw with a masonry blade (for precise cutting)
- Trowel
- Caulk gun
Materials:
- Retaining wall caps (stone, concrete, or other suitable material)
- Landscape adhesive (masonry adhesive)
- Geogrid or landscape fabric (for additional stability, if necessary)
- Clean sand or fine gravel (for leveling and filling gaps)
Choosing the Right Retaining Wall Cap Materials
Choosing the right material for your retaining wall cap is a crucial step. The material you select should not only complement the design of your wall but also be durable enough to withstand weather conditions and wear. Here are some of the most common materials used for retaining wall caps:
1. Concrete Caps
Concrete caps are one of the most popular choices due to their affordability, durability, and variety of shapes and sizes. They are easy to cut and install, making them ideal for most DIY projects. Additionally, concrete caps can be customized to match the color and texture of your retaining wall.
2. Natural Stone Caps
Natural stone, such as granite, limestone, or sandstone, is a premium choice for retaining wall caps. Stone caps provide a timeless and elegant look, especially in more natural or rustic landscapes. While more expensive than concrete, natural stone is incredibly durable and resistant to weathering.
3. Brick Caps
Brick caps offer a classic look, often used in traditional or historic settings. They provide a consistent and smooth finish to the wall. However, bricks can be more challenging to cut, requiring precise masonry skills.
4. Precast Stone Caps
Precast stone caps are made from molded concrete that mimics the appearance of natural stone. They are a great option if you’re looking for the appearance of stone without the higher price tag. These caps come in various colors and styles, allowing you to customize the look of your wall.
Each of these materials has its pros and cons, and the best choice will depend on your budget, the style of your wall, and the specific demands of your climate.
Step-by-Step Process for Installing a Retaining Wall Cap
Now that you have selected your cap material and gathered the necessary tools, it’s time to begin the installation process. Follow these steps to ensure a professional-looking finish.
Step 1: Prepare the Surface
The first step in installing your retaining wall cap is to prepare the top surface of the retaining wall. Clean the top of the wall thoroughly, removing any debris, dirt, or loose material. It’s crucial to start with a clean surface to ensure proper adhesion of the cap stones.
If your wall has been exposed to weather for an extended period, you may need to use a pressure washer or a stiff brush to remove stubborn dirt. Allow the wall to dry completely before proceeding.
Step 2: Dry Fit the Cap Stones
Before applying any adhesive, it’s important to dry-fit the cap stones. This means placing the caps on top of the wall without any adhesive to ensure they fit together properly. During this step, you can determine if any caps need to be cut or adjusted to create a snug fit.
Start at one end of the wall and lay the caps in a straight line. Make sure the edges are aligned, and the caps are evenly spaced. If your wall curves, you may need to adjust the positioning of the caps slightly to follow the curve. Mark any caps that need to be cut with a pencil or chalk.
Step 3: Cut the Cap Stones (If Necessary)
If you need to cut any cap stones to fit the wall, now is the time to do so. Use a circular saw with a masonry blade to make clean, precise cuts. Alternatively, for smaller adjustments, you can use a hammer and chisel to chip away material.
When cutting, always wear safety gear, including goggles and gloves, as the process can generate dust and debris. Take your time to ensure that the cuts are accurate and smooth. After cutting, dry fit the caps again to ensure a proper fit before moving on to the next step.
Step 4: Apply Adhesive
Once you’re satisfied with the dry fit of the cap stones, you can begin securing them to the wall using landscape adhesive. Use a caulk gun to apply a generous bead of adhesive along the top of the retaining wall, focusing on the center where the cap will rest. For added security, apply a smaller bead of adhesive along the edges of the wall as well.
Place the cap stones back onto the adhesive, pressing down firmly to ensure good contact. Use a rubber mallet to gently tap the stones into place, ensuring they are level and seated correctly. Be careful not to apply too much pressure, as this could cause the adhesive to squeeze out from under the cap.
Step 5: Ensure Proper Alignment and Spacing
As you place each cap stone, use a level to check that it is straight and even with the surrounding stones. This is important for both the aesthetic appeal and the structural integrity of the wall. Continue placing the cap stones along the length of the wall, checking frequently for alignment and adjusting as needed.
For walls with curves, you may need to adjust the spacing between the caps slightly. Leave a small gap between each stone to allow for expansion and contraction due to temperature changes.
Step 6: Fill the Gaps (If Needed)
After the caps are in place, inspect the gaps between them. For larger gaps, you can fill them with clean sand or fine gravel to create a more finished look. Simply pour the sand or gravel into the gaps and use a trowel to smooth it out. This step helps prevent dirt and debris from accumulating in the gaps over time.
If you prefer a more seamless look, you can also use a matching grout or mortar to fill the gaps. However, this method may require more maintenance over time as grout can crack with temperature fluctuations.
Step 7: Allow Adhesive to Cure
Once all the cap stones are in place, allow the adhesive to cure for the recommended time, usually 24 to 48 hours. During this time, avoid placing any weight or pressure on the wall to ensure the caps bond securely.
If you’re working in hot or humid weather, check the manufacturer’s instructions for any adjustments to curing time. Proper curing is crucial to the long-term durability of your retaining wall cap installation.
Step 8: Final Touches and Maintenance
With the caps securely installed, your retaining wall is nearly complete. Take a final look to ensure all the caps are level and properly aligned. Clean off any excess adhesive that may have squeezed out during installation using a damp cloth or a plastic scraper.
Going forward, regular maintenance of your retaining wall cap will help ensure its longevity. Inspect the caps periodically for signs of damage, such as cracks or loose stones, and repair them as necessary. Cleaning the caps annually will also keep them looking their best and prevent the buildup of dirt or moss.
Common Mistakes to Avoid When Installing Retaining Wall Caps
While installing a retaining wall cap may seem straightforward, there are several common mistakes that can compromise the final result. Here are some pitfalls to avoid:
1. Skipping the Dry Fit
Failing to dry fit the cap stones can lead to misalignment and uneven gaps. Always take the time to test-fit the stones before applying adhesive.
2. Using Too Little Adhesive
Insufficient adhesive can cause the cap stones to shift or come loose over time. Be generous with the adhesive to ensure a strong bond.
3. Neglecting to Check for Level
If the cap stones are not level, your wall may look uneven and unprofessional. Use a level frequently during installation to ensure a smooth, even surface.
4. Cutting Corners on Curing Time
Rushing the curing process can weaken the bond between the caps and the wall. Always allow the adhesive to cure fully before using the wall.
Conclusion
Installing a retaining wall cap is a crucial step in ensuring the longevity and aesthetic appeal of your retaining wall. By following this step-by-step guide and using the right materials and tools, you can achieve a professional-looking result that will stand the test of time. Whether you’re tackling a DIY project or working as a professional landscaper, the tips and techniques outlined here will help you complete your retaining wall cap installation with confidence.
Read Also Our This Post: Top 5 Cargo Van Wall Liner Materials to Protect Your Van Interior

Kamran Khatri is a versatile writer and editor at ExpressZone.co.uk, bringing fresh perspectives and insightful commentary across a wide range of topics. With a passion for exploring diverse subjects—from technology, business, and finance to lifestyle, travel, and the arts—Kamran aims to inform, inspire, and engage readers through well-researched articles and thought-provoking content.
His work spans multiple categories including health, education, pets, entertainment, real estate, and sustainability, reflecting his commitment to delivering knowledge that connects with everyday life. Whether breaking down the latest trends, sharing practical tips, or highlighting cultural insights, Kamran’s writing combines clarity with creativity.
When he’s not crafting stories for ExpressZone.co.uk, Kamran enjoys keeping up with global developments, exploring innovative ideas, and connecting with readers who share his curiosity about the world.


